Add-On Setup Instructions
Updated 2/22/05
Back to ACW Campaign Games Design Center
Important News:
As of Corinth Patch 1.02, you will no longer be able to use the Add-Ons at this site. I would definitely recommend following the instructions below and patching this "Campaign Civil War" game up to Corinth Patch 1.01a. That way you can patch your regular Corinth folder to the latest version.
UPDATE: Now that Ken Miller has created a new leaders.bmp file which can be used for all newly produced scenarios, the below procedure can be greatly simplified. All you need to have now is Ken's leaders.bmp file in your Info folder, and make sure the OOB files of the scenario you are playing are compatible with Ken's file. As of 12/08/02, Chris Hopper's scenarios on this site are compatible, as well as Tom Hicks' Wilderness scenario located here. Ken has the changes needed to play Pete Seibel's mods on his Add-Ons page. If you are unsure if a certain scenario works with Ken's file, e-mail me and I'll do my best to help you out.
I realize that many of you are not computer whizzes so I've decided to set up this page to try to answer any questions you might have concerning how to get add-ons to load and play properly. I'll start with the setup I'm using on my computer including explanations and screenshots.
Step 1:
Create a new folder for your collection of add-ons.
I have chosen to call mine "Campaign Civil War". Feel free to choose any name that suits you. Simply copy the Campaign Corinth folder, move up one directory, and paste it. Then change the name to "Campaign Civil War", and cut and paste the folder back into the HPS folder. When you are finished you should have something like the screenshot below.

Step 2:
Delete all of the Campaign Corinth scenario files.
Now that you have your copy made, you'll want to delete all of the stock Campaign Corinth files from it. Please note that a lot of the mods being made depend on .pdt, .oob, and .map files which came with Corinth, so it might be a good idea to keep these.
Step 3:
Go to the Info folder in your new "Campaign Civil War" folder and make some modifications.
After you have deleted the unnecessary Corinth scenario files, it is time to set up the Info folder so you will have the correct leaders and units appear in your add-ons. First, you'll want to make a new folder called "Original Leaders and Units Files", or something similar. Then copy and paste the stock Corinth Leaders.bmp and Units.bmp files into this folder. This insures that you will have these originals whenever you want to start from scratch. Note it is highlighted in gray below. Also note the Leaders and Units files below.
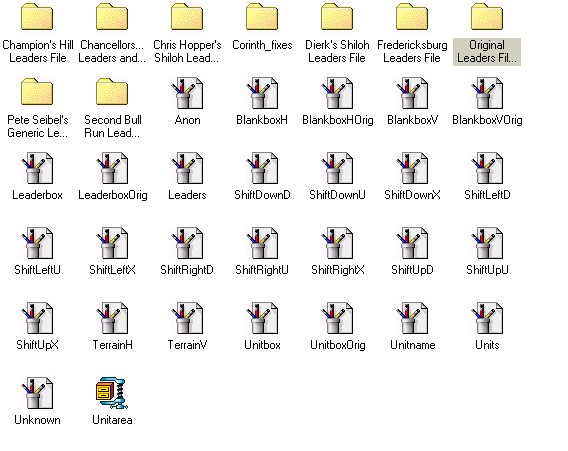
Now, whenever you download a new add-on and it contains a leaders.bmp or units.bmp file, create a new folder in Info for it. For instance, Pete Seibel's Chancellorsville Download has a new units and leaders file, so I've created a folder for them. This way, when you want to play a certain mod, just go to the folder and copy and paste the files into Info and you'll be ready to go! All other files, such as .pdt, .oob, .map, and .scn files all go into the main "Campaign Civil War" folder.
Step 4:
Create a new folder in the Windows Program Files directory so you can start the game just like you start Corinth.
This is really pretty easy.
For Windows 95, 98, ME, and 2000 users:
Click on "My Computer" on your desktop, go to the hard drive you have your games on (typically (C:)), and then select the "Windows" folder. Once in "Windows", click on "Start Menu" and then "Programs".
For Windows XP users:
Click on "My Computer" on your desktop, go to the hard drive you have your games on (typically (C:)), and then select the "Documents and Settings" folder, the "All Users" folder, the "Start Menu" folder,and finally "Programs".
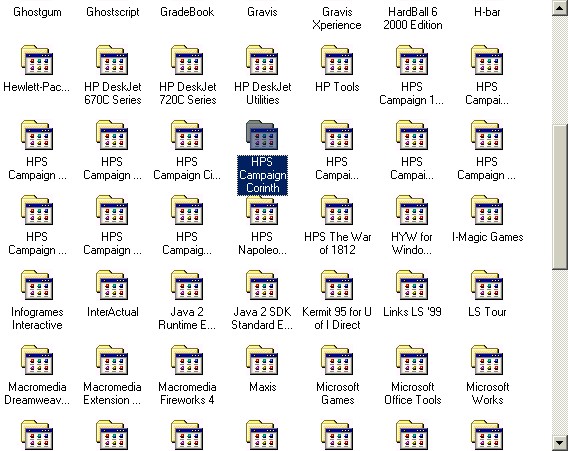
The "Programs" folder is the folder where all of the items you see when you click on the "Start" button, and "Programs", are stored. A view of this folder is provided below. Find HPS Campaign Corinth, as highlighted below. Copy this folder, and then move back out to the "Start Menu" folder. Paste the folder there, and change its name. I used HPS Campaign Civil War. Cut and paste this back into the "Programs" folder.
You are not quite finished here yet. Click on your new "HPS Campaign Civil War" folder and you should see the window below.
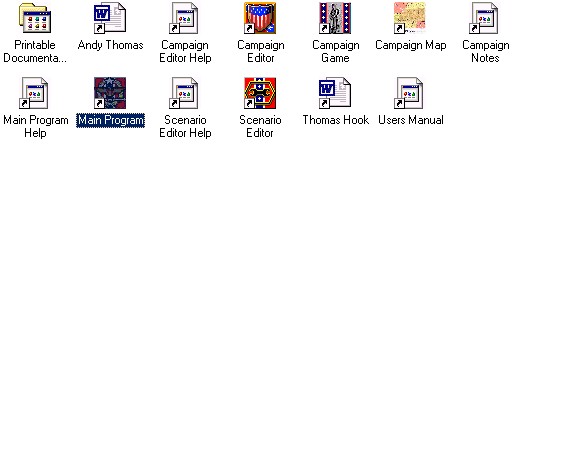
You need to right-click on Main Program, highlighted above, and then click on "Properties". Wherever it says Campaign Corinth in any of the fields, usually the "Target" and "Start In" fields, change it to Campaign Civil War instead. You are doing this in order to link this shortcut to your Campaign Civil War folder instead of your Campaign Corinth folder. Also repeat this process for "Campaign Editor", Scenario Editor", and "Campaign Game", all located in the screenshot above. These must all be linked to Campaign Civil War in order for this to work properly. You can ignore the other files. They can stay linked to Corinth. Now when you go to start "Campaign Civil War", you will have the ability to start it just like you start Corinth.
Note: I also realize that not everyone has the disk space required to use the above steps. In that case, simply use your Corinth folder, and just make the changes to your Info folder as described above in Step 3.